|
|
|
|
Specify
Processing Steps in Design File
The processing steps
to perform in the analysis of the image data can be predefined in the design file.
This is done by selecting the processing steps that should be performed and
altering them, if necessary, to match the steps you would like to perform in
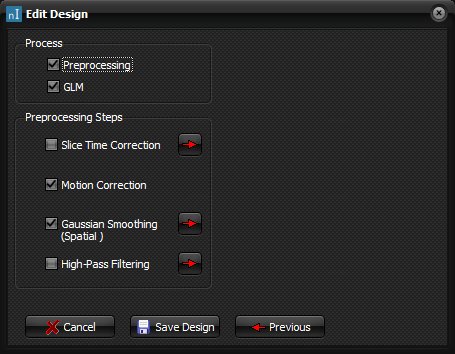
the analysis. Process
Specify the processing
steps to be performed in the analysis. Preprocessing
Check to perform
preprocessing. GLM
Check to estimate GLM. Note that
the statistical analysis is performed
automatically by the program. Preprocessing
Steps
Specify the
preprocessing steps to perform prior to estimation of the GLM and the statistical
analysis. This is done by selecting the preocessing steps that
should be performed and altering them, if necessary, to match the steps you
would like to perform in the analysis. Slice
Time Correction
Check to perform slice time correction. Please note that it is the users responsibility to set up the slice time
acquisition mode. Slice time correction
is done to correct for the fact that for a given volume in the image
time-series, each slice is acquired at a different time point. The correction
is done using spline interpolation. For block designs, slice time
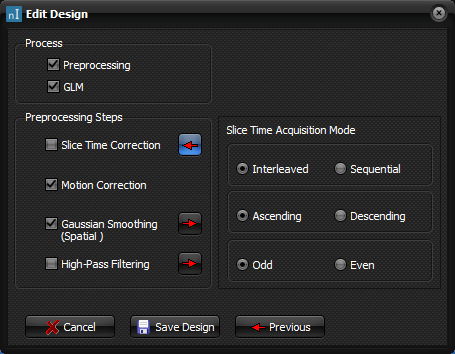
correction might not be critical Specify Slice Time Acquisition Mode
Specifying the slice time
acquisition mode is the same as setting up the order of the acquisition. The
different possibilities are:
Note that the slices are numbered from 1. Therefore, if there are 10 slices in a volume, an ascending
interleaved sequence with odd start scan would be {1-3-5-7-9-2-4-6-8-10}. Motion
Correction
Check to perform
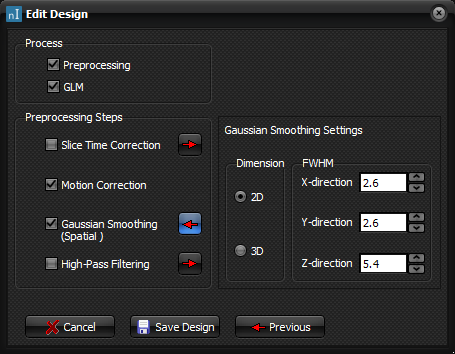
motion correction. Gaussian
Smoothing (Spatial)
Check to perform Gaussian spatial smoothing.
High-Pass
Filtering
Check to perform
temporal high-pass filtering. Wavelength in Seconds
Specify the wavelength
of the high-pass filter in seconds. The cutoff
frequency in Hz is automatically updated. Cutoff Frequency in Hz
Specify the cutoff frequency
of the high-pass filter in Hz. The wavelength
in seconds is automatically updated.
Other Options
Cancel Button
Abort edit of
existing, or creation of new, design file. Save Design Button
Save design file
with the name specified in design name. Previous Button
Go to the previous page. Related topics:
Edit/create
design file
|
|