|
|
|
|
Export
Settings
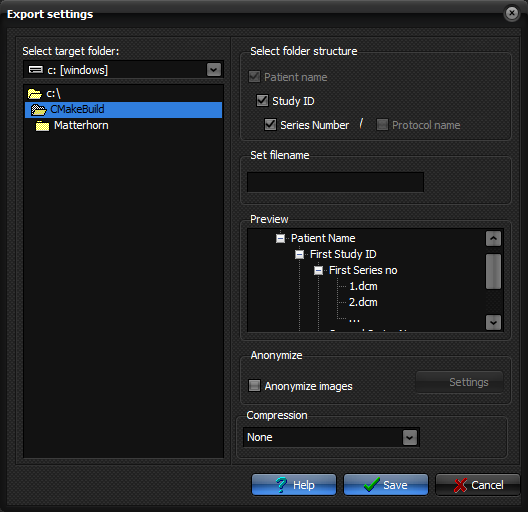
The Export
Settings dialog
Select targe folder: Here you can select the targe disk and folder of the export. The
target folder must be an existing folder. : Here you can mark what folder you want created inside the targe
folder, to ease the organization of exported images. Look in
"Preview" to see what folders will be created. E.g. by selecting
Patient Name, and Study ID as illustrated, there will be created a folder for
each patient exported in the target folder, and within these, a subfolder for
each study, containing all the studys images. Set filename: Here you can set an optional filename prefix for the exported
images. E.g. setting the filename to "test_", will make the
exported images be named test_1.dcm, test_2.dcm and so on. Anonymize: Select this to have the images anonymized during export. Settings: Click this to edit the way the images are anonymized during
export, if anonymization has been selected. Compression: Select a compression to use for the exported images. By selecting
none the images will be exported as DICOM with explicit or implicit little
endian, depending on their original syntax. Please mark that JPEG
compression has a limit of 3 images per second, so using this option may
slow down the export. Note: The Export
settings dialog can be displayed by pressing the Export button on the Database
tab of the nordicICE database dialog Tips:
Related topics:
Edit Values for anonymization
|
|