|
|
|
|
Overlays
in MPR
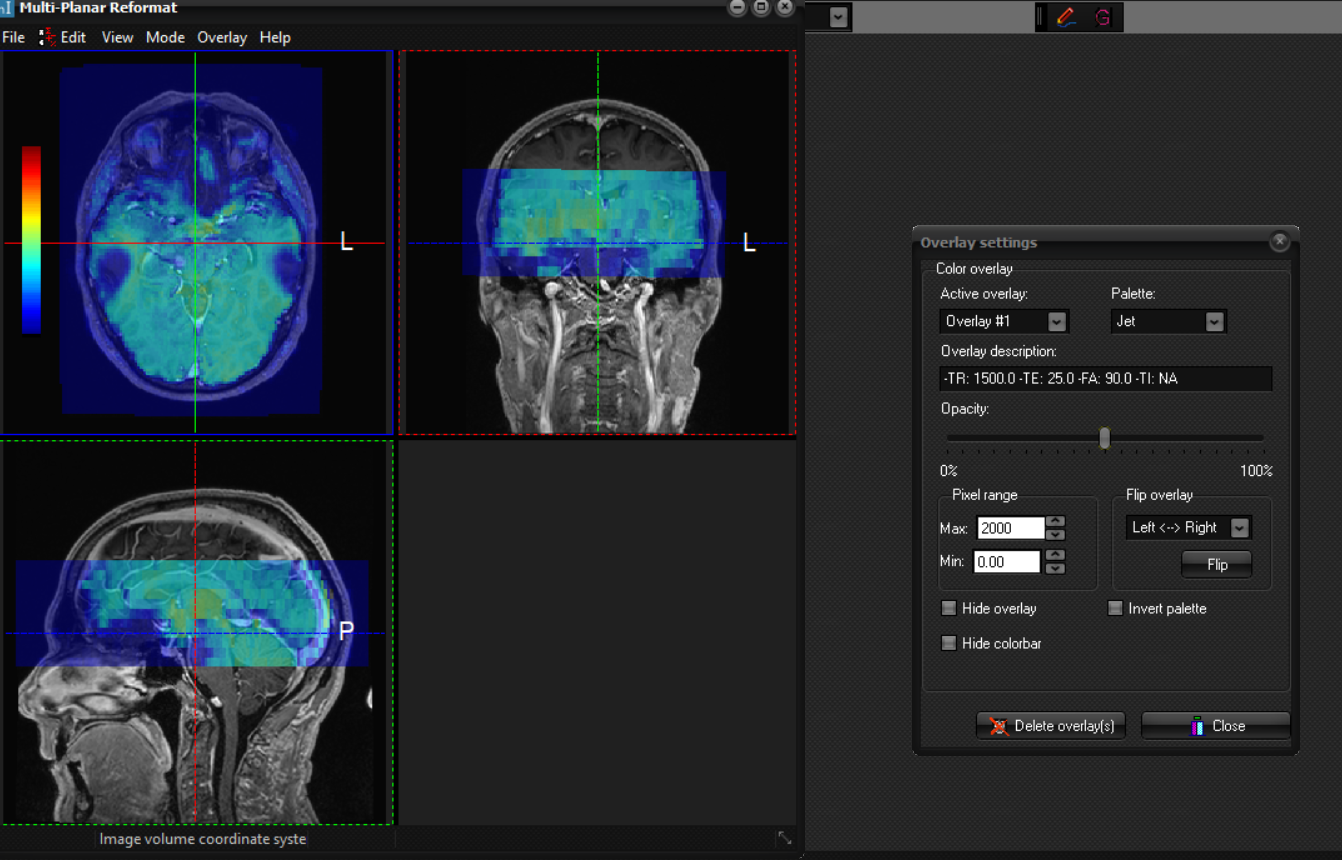
Overlays may be vizualized in the MPR view in a similar way to any image
window in the nordicICE workspace. There is, however, one significant difference
in the display of overlays in the image window and in the MPR window. In the
image window overlays are interpolated into the coordinate system of the
underlay. This means that parts of overlay volumes that extend beyond
the bounds of the underlay volume are truncated. In MPR overlays may be
displayed in their full extent. Overlays may extend above or below the
underlay, e.g. to regions of the head where there are no underlay
slices. One illustration is given below, in which one overlay is color coded in red and the underlay is greyscale. Loading from file
Loading overlays in
MPR:
Any number of overlays
may be loaded in MPR as long as enough memory is available on the computer
system. When defining an overlay in MPR, i.e. when loading an image volume as
overlay, the image window for which MPR was launched also loads the overlay
volume. The opposite is true also, so that if an overlay is defined for an
image window, either by drag-and-drop or by loading a new image volume as
overlay, the corresponding MPR window loads the overlay volume. Modifications
Modifying overlays in
MPR:
As for overlays
displayed in an image window in the nordicICE workspace one may modify
various settings with the overlay. The topic is treated for the main window
in the section Modify image overlays. Deletion
Deletion of overlays
in MPR:
When overlays are
deleted from the MPR window, the overlay is also removed from the
corresponding image window, and vice versa. Zero below
threshold
Zero overlay
intensities below threshold in MPR:
The user may zero
pixel intensities in the overlay that are below the threshold specified in Settings' Win L/W Presets tab. Tips:
|
|