�
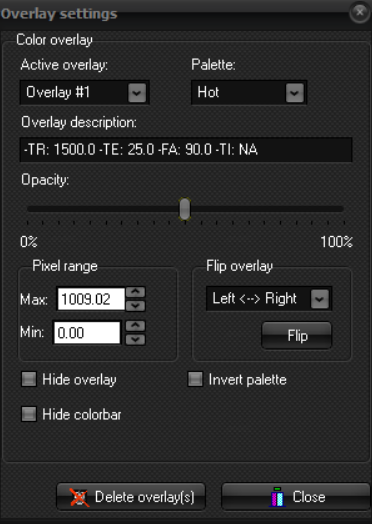
Active Overlay:
select from the dropdown menu the specific overlay to be modified in the case
of multiple overlays.
�
Palette:
select the appropriate palette from the dropdown menu for the overlay
selected in Active overlay. The different overlays may have different
palettes.
�
Overlay description: a
text string identifying the active overlay.
�
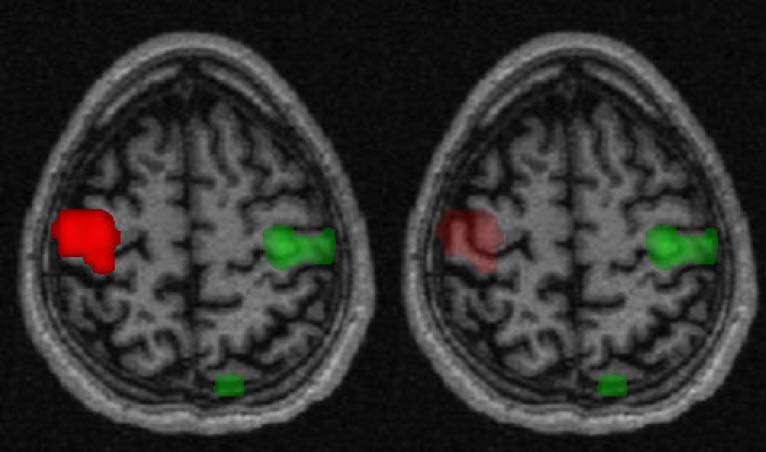
Opacity: The
slide bar varies the degree of opacity (=1-transparency) of the overlay. 100
% opacity means maximum opacity (no transparency). The opacity is varied only
for the overlay specified in Active Overlay, and multiple overlays may
have different degrees of opacity. The opacity may be varied in real time,
allowing viewing with changing levels of opacity.
�
Window / pixel range: Sets
the maximum / minimum window and pixel values which are rendered to screen.
This is like the window level /width function for the image underlay, but instead
of setting level/width values the max and min window values are set directly.
For some image types (Nifti), the actual pixel
values may include a scaling factor (e.g. to scale
the resulting pixel range between 0.0 and 1.0), and for such images the pixel
range displays the actual pixel range corresponding to the set window range.
The pixel range can also be edited, and the window range will the be updated correspondingly. If the window->pixel
scaling factor is 1.0 the window and pixel ranges will be the same.
�
Flip overlay: flips the overlay along a
selected axis (L/R, U/D, slice reorder). Note that the geometry info is not
modified, only the visual presentation of the overlay.
�
Hide Overlay: When
checked the overlay specified in Active overlay is temporarily hidden.
- Invert palette: When checked the palette of the
overlay is inverted.
�
Hide Colorbar: The
palette colorbar normally appears on the left of
the image to aid interpretation during image examination. Check this box to
hide the colorbar. This also hides the colorbar when the image with overlay is copied to the
clipboard.
�
Delete overlay(s):
Clicking the Delete
overlay(s) button deletes all loaded overlays.
�
Close: Click
Close
to close the dialog and retain the selected settings