Using the BOLD+DTI analysis wizard
nordicICE includes easy-to-use step-by-step wizard that guides you through the process of loading and analyzing BOLD fMRI and DTI datasets.
1. Starting the Wizard
When nordicICE is launched, click 'File->Open BOLD/DTI Wizard...' on the main menu. Alternatively, you can use the keyboard shortcut 'Ctrl+B'.
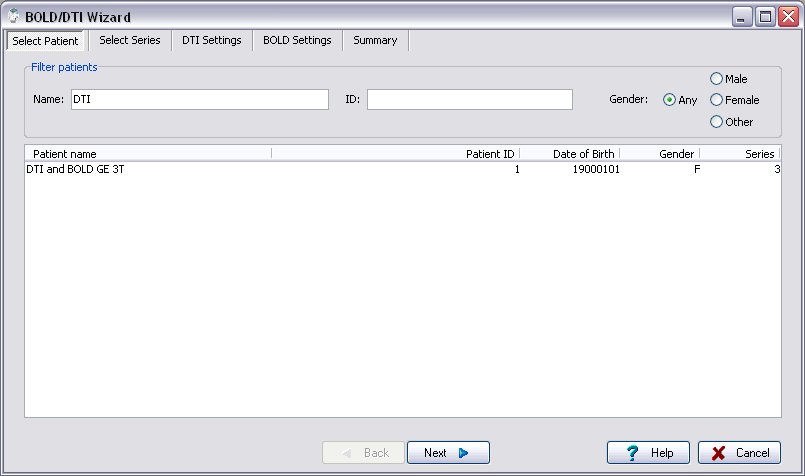
2. Select the patient
In the first step of the wizard you need to select the patient for which you are going to perform the analysis on. The first window therefore displays a list of the available patient dataset currently present in the local DICOM database. Note that here you can use the 'Filter patients' field on the top to narrow down the number of entries in the list. Select a patient by clicking it, and click the 'Next'-button to proceed to the next step.
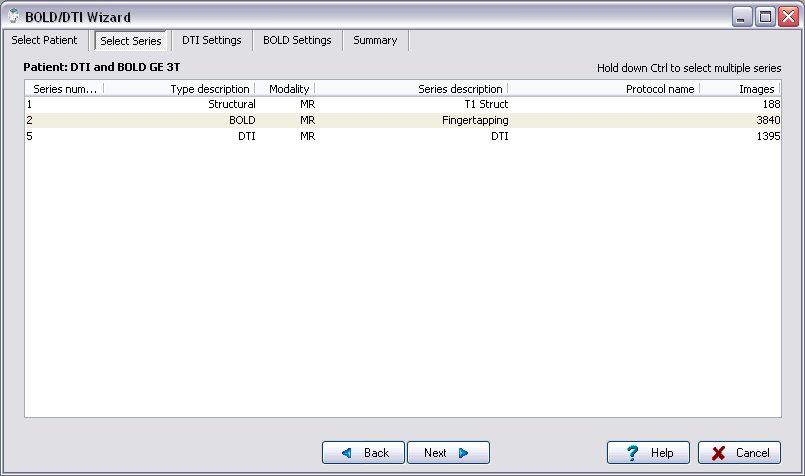
3. Select image series
In this step you need to select which datasets you are going to analyze. A list of all available image series for the patient you selected in the previous step is shown here. For each image series, some of the cruicial DICOM attributes are listed; Series number, Modality, Series description, Protocol name and number of images. In addition, there is a field called 'Type description'. This is a field that is used by nordicICE to distinguish the different image series in terms of defining which image series are the BOLD, DTI and Structural datasets.
You now need to specify the 'Type description' of the image series you are going to analyze. In order to specify the type, right-click on a image series and select the type from the popup menu:
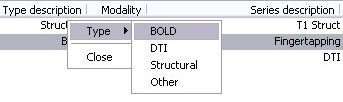
Note that nordicICE will remember the type descriptions you have defined here, so that next time you run the Wizard on the same Patient the type descriptions will already be defined here.
Select the datasets to be analyzed by holding down the Ctrl-button and clicking on the respective image series. Before proceeding you need to select 1 Structural and BOLD and/or DTI dataset. Note that you can include several BOLD-datasets (e.g. if you have run several paradigms), but only 1 DTI dataset. Click the 'Next' button to continue to the next step. The data you have selected will now be loaded and you are ready to configure the analysis settings.
4. Configure DTI settings
If you included a DTI dataset in the previous step you will be taken to 'DTI settings' step (note that if you only included a BOLD-dataset this step will be skipped). Here you need specify the analysis settings for the DTI dataset.
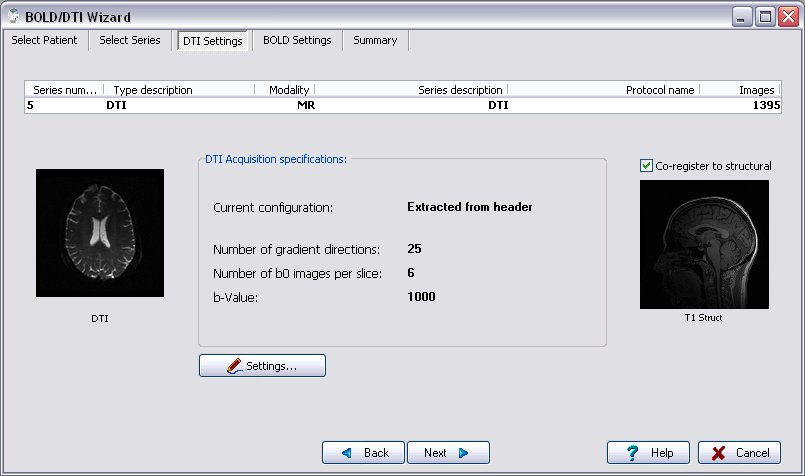
In order to perform the analysis of the DTI dataset, the DTI Acquisition parameters needs to be specified. In particular, you need to make sure that the diffusion gradient directions and the b-value are defined here. If the 'Current configuration: ' says 'Extracted from header', it means that the settings were read from the DICOM header of the images. If no such information was found, the entries here will be listed as 'Not specified', and you need to configure this manually.
Note that if all necessary settings are already pre-defined here, you can simply click 'Next' to proceed to the next step.
All settings can be configured and adjusted manually by clicking on the 'Settings' button. You will then be presented the Diffusion Tensor Imaging settings window that allows you to define the various acqusition parameters and processing options.
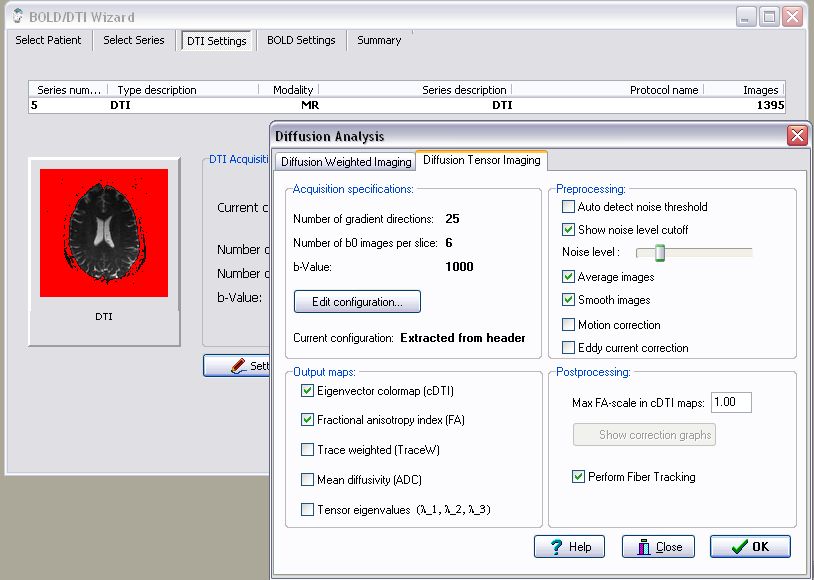
Here you should also set a proper noise threshold for the analysis. If the 'Show noise level cutoff' in the Settings window is enabled, all pixels below the current threshold in the Wizard DTI thumbnail image will be shown in red. By using the 'Noise level' slider you can set a propriate noise level. When finishing the settings, click 'OK' to close the settings window. Note that all settings you define here will be remembered, so that next time you run a similar analysis you can simply click 'Next' in this step to run the analysis with the same settings.
On the right side of the Wizard window you have the possibility to enable a 'Co-register to structural' checkbox. By clicking this box, the DTI dataset will be co-registered to the structural dataset prior to performing the DTI analysis. This will allow you to make sure that the reconstructed white matter fiber tracts will be aligned with the structural volume dataset.
5. Configure BOLD settings
If you included a BOLD dataset in step 3 you will be taken to 'BOLD settings' step (note that if you only included a DTI-dataset this step will be skipped). Here you need specify the analysis settings for the BOLD dataset.
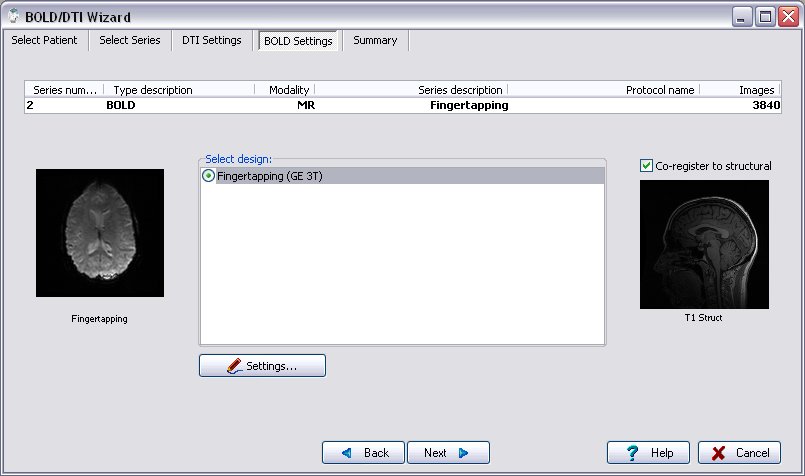
In this step a list of available designs will be listed. These designs contains all information needed to perform the BOLD analysis; i.e. both the paradigm information and which processing steps to be performed and parameters to be used. Such designs can be imported or created by clicking on the 'Settings' button which will open the BOLD analysis dialog .
On the right side of the Wizard window you have the possibility to enable a 'Co-register to structural' checkbox. By clicking this box, the BOLD dataset will be co-registered to the structural dataset prior to performing the BOLD analysis. This will allow you to make sure that the resulting activations will be aligned with the structural volume dataset.
Select the design from the list and click the 'Next' button to proceed to the next step.
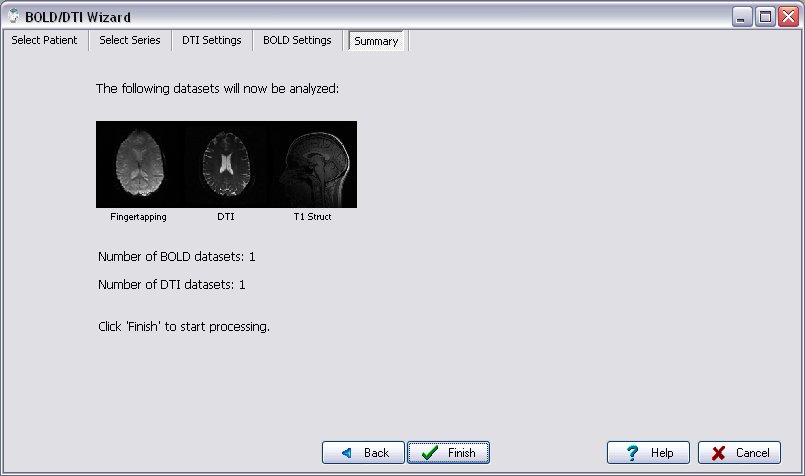
6. Start the analysis
At the last step of the wizard a summary page will be displayed showing which datasets that has been selected for this session. Click 'Finish' button to complete the Wizard and start the analysis. The wizard will now be closed and the MPR viewing window will be opened allowing you to visualize and interact with the analyzed data.
![]()