|
|
|
|
Batch
- ASL Analysis
To
do ASL analysis in batch, follow these steps: 1.
Organize
input data to be analyzed in a base directory and
give the subdirectories containing the series to be analyzed
a given name. 2.
Select/check
the settings for image loading in the Pre-process tab. 3.
Define
all settings for the analysis you would like to do for the ASL analysis
(Main, Options, Parameters and Quantification, as applicable). 4.
Set
base directory and do Search
for files. 5.
Run
the analysis by selecting Process.
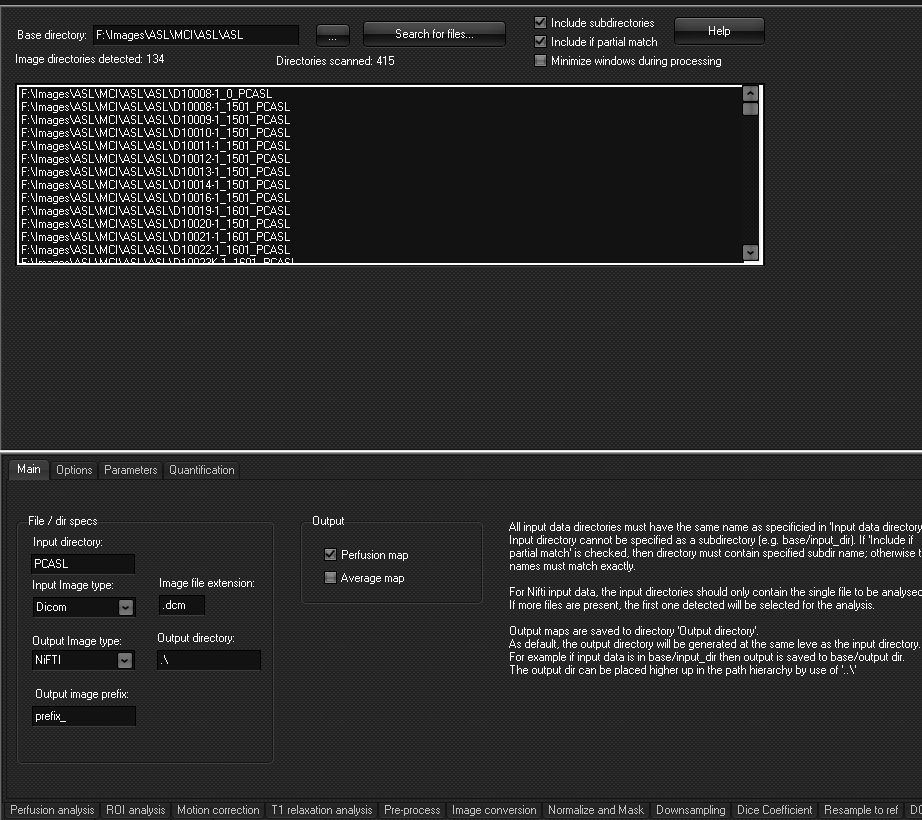
See
additional details below. The Main tab
Output:
The
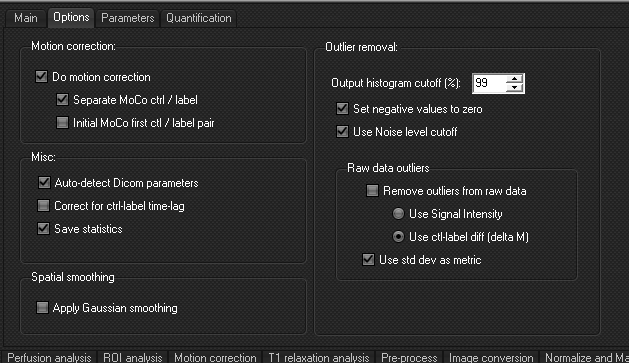
batch ASL can produce the perfusion map (blood flow map), and an average map. The Options tab
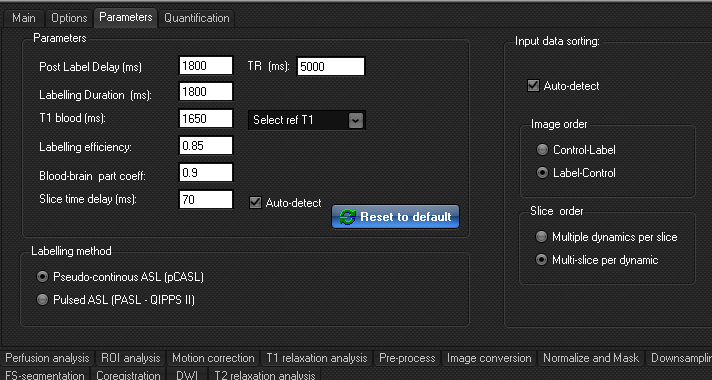
The Parameters
tab
Parameters: TR
is read from the DICOM header when present. Other
parameters are set in accordance with recommendations in Alsop et al (Recommended implementation of arterial
spin-labeled perfusion MRI for clinical
applications, Mag Reson Med 2015). Labelling method: Labelling
method should be in accordance with the acquired data type. Input data sorting: Input
data sorting can be auto-detected for DICOM data,
given that correct tags are present in the DICOM header. If not, this must be
specified manually. For nifti data, this needs to
be specified correctly, or the analysis will not be valid. It
is always recommended to run the analysis with one series to make sure that
the settings for image order is correct on your data. It can also be useful
to use the GUI batch module to verify the order. The
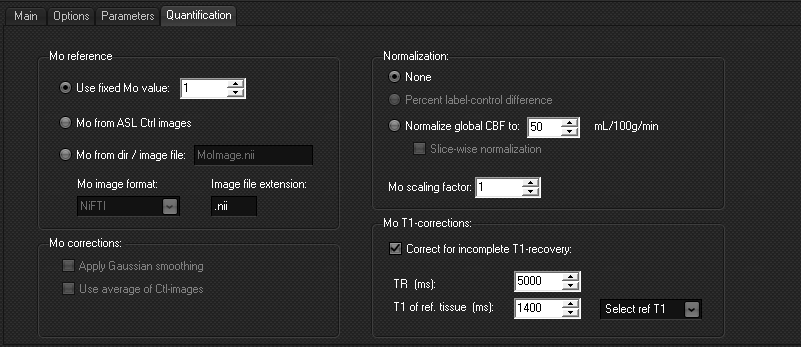
Quantification tab
|
|