|
|
Batch
- Perfusion Analysis
To
do perfusion analysis in batch, follow these steps:
1.
Organize
input data to be analyzed in a base directory and
give the subdirectories containing the series to be analyzed
a given name.
2.
Select/check
the settings for image loading in the Pre-process tab.
3.
Define
all settings for the analysis you would like to do for the perfusion analysis
(Main, AIF, Advanced AIF, Deconvolution, Options, Leakage correction and
Signal conversion, as applicable).
4.
Set
base directory, and do Search for files.
5.
Run
the analysis by selecting Process.
See
additional details below.
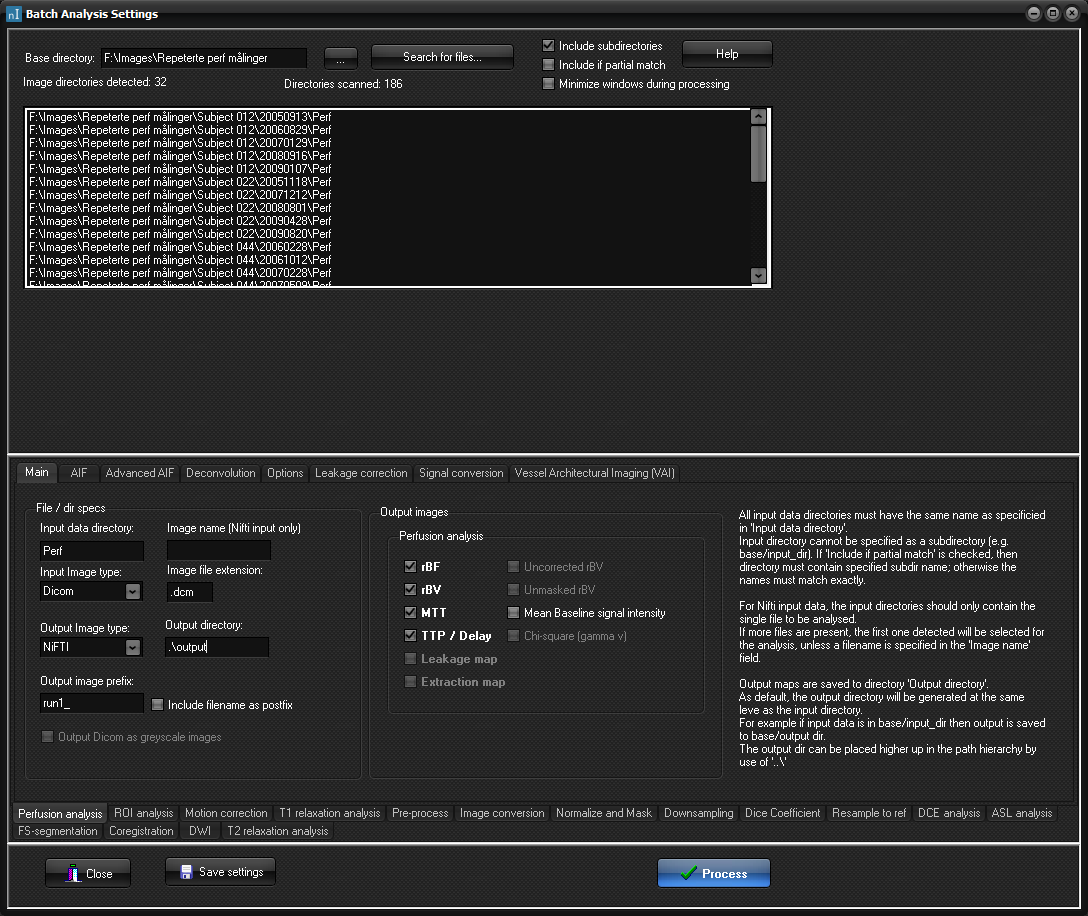
The Main tab

- Subdirectory name: the name of the subdirectory
containing the perfusion series. If several studies are to be analyzed, the name of the subdirectory containing
the perfusion series must be the same for all studies.
- If ‘Included
if partial’ match is checked, the subdirectories can have
similar names.
- Input image type can be either DICOM or nifti.
- File extension can also be left open.
- Output image type can be either DICOM or nifti. This means, that if the input data is DICOM,
and output data can be either DICOM or nifti.
- You can specify a dedicated folder for the output
images that are produced in the analysis. If this is left blank, all
output maps are stored directly in the directory of the study.
- You can specify a prefix to the output images.
- If Output
Dicom as greyscale images is not
checked, all output maps are saved as RGB images. Thus, in most cases,
one would like to check this box. Note that you can add a palette to the
map if you open the map in nordicICE. This checkbox is only applicable
for Dicom output data. For nifti
output data, images will always be saved as greyscale images.
Output
images: Some output images are only available when specific settings are
used:
- Leakage map is available when leakage correction is
used.
- Extraction map is available if residue function
leakage correction method is selected.
- Uncorrected rBV is
available when leakage correction is used.
- Unmasked rBV is available
when vessel removal is used.
- Chi-square map is available when gamma variate is
used for parametric modelling.
Defining the
arterial input function (AIF)
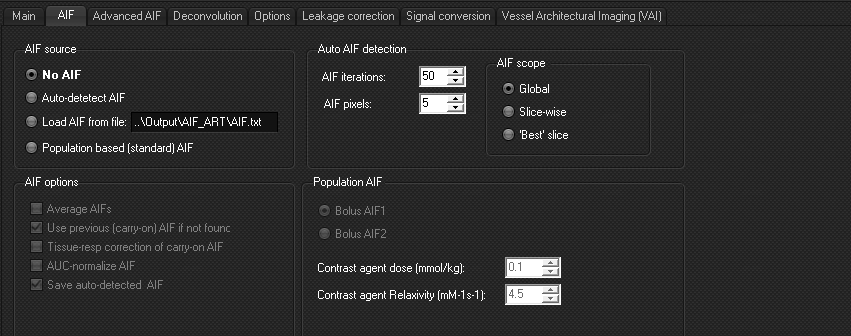
Analysis
can be done with:
- No AIF
- Auto-detect AIF: a global search in the entire dataset
will be performed. The used AIF can be saved as a text-file.
- Load from file: use a selected AIF of your choosing.
- Population based AIF: select between two predefined
AIF based on literature studies.
All
other settings and options are the same as in the GUI
perfusion module.
|
|