|
|
|
|
Navigation
in MPR
Navigation in MPR
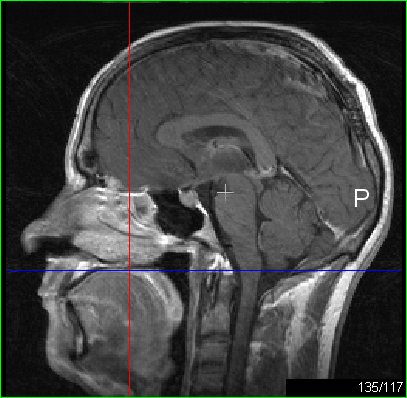
includes the selection of a position in one of the projection images. This
selection determines the coordinates of the projection planes in the two
other projection panels and leades to their update.
But navigation also allows for a wider set of view transforms. Selection of new
projection images
Clicking
initially on any one of the projection images immediately places the
crosshair such that they intersect at the position of the mouser pointer. The
adjacent projection images are updated in
accordance with the new location of the crosshair. By pressing the left
mouse button and dragging the crosshair is
repositioned and the other two projection images and crosshairs are continusly updated. Any
of the two lines in a crosshair may be moved separately. E.g.
if the left mouse button is pressed when moving the mouse pointer over the
green line in the axial image only the sagittal projection image is
updated. The shape of the mouse cursor changes from the usual cross to a
shape with lines at either end when it is within the distance of updating a
single line. The Settings' Multi-Planar Reformat tab allows
the user to set the distance from any of the crosshair lines within which only
the nearby line is updated. By default a crosshair
line is selected if the mouse pointer is in the range of five pixels
away when the left mouse button is clicked. Also,
the crosshair lines in the active projection panel may be updated separately
using the keyboard arrow keys. By pressing Shift and the right or left
key the vertical crosshair line is moved to the right or left, respectively.
Pressing the Shift and the up or down key moves the horizontal line
accordingly. The amount of position increment/decrement corresponding to one
click on an arrow key may be set in Settings'
Multi-Planar Reformat tab . By default the
increment/decrement is one pixel. Transformations
The
projection views may be modified by applying various transformations. This
allows e.g. an image volume to be visualized from
any angle the user may want. Three
types of transformations are implemented in MPR: translation, rotation and scaling. When combining these transformations the user should be aware that the order of
which they are applied is opposite to the order listed above. Thus first any scaling transformation is performed
followed by rotation and finally translation. Rotation and scaling is performed with respect to a "vertex", a
single point in space, and the same vertex is used for rotation and scaling. Thus any repositioning of the vertex e.g. when in rotation
mode may have implications for scaling applied prior to the rotation. Transformations
in MPR implies transformations to the projection planes. If a translation or
rotation is applied, it is the projection plane that is translated or
rotated. The patient is not translated or rotated. And obviously if scaling
is applied, it is not the patient that is contracted or expanded. Only the
pixel dimension of the projection images are
updated. However,
transformation in one projection panel implies transformation in at least one
of the other transformation panels. Since e.g. the
vertical axis in the sagittal projection is the same as the vertical axis in
the coronal projection, any translation or scaling along this axis in the
sagittal projection is accompanied by an automatic translation or scaling in
the coronal direction. And if rotation around this axis is done, which may be
done in the axial projection panel, both the coronal and the sagittal
projection images are updated accordingly. The
current transformation, if any, is displayed in the status bar. Also, the above mentioned positioning of the crosshairs using the
mouse pointer is disabled when in any transformation mode. Translation
Enable
translation in MPR:
Choosing
translation mode allows the user to drag the projection plane to new
positions. The object, such as the head in the the
figure, shown in the projection images is shifted in directions along the
projection plane in which translation is performed. E.g.
if translation is done by dragging the object as displayed in the saggital projection, the object is shifted along the axes
defining the sagittal projection plane. In translation mode
the label in the lower left corner of each projection panel displays the
amount of translation along the plane axes. The unit of translation is mm.
Each projection panel also has a button that allows reset of the translation
along axes in that panel. Rotation
Enable
rotation in MPR:
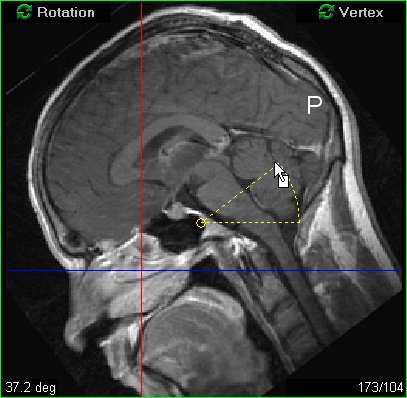
Rotation
mode allows the user to rotate the projection plane around the axis that is
orthogonal to the plane. Thus in the sagittal
projection panel any rotation occurs around the left-right axis. In
rotation mode all projection panels contain a "rotation pie" whose
legs may be rotated around the center, the
"vertex". By pressing the left mouse button and dragging the amount
of rotation is updated. By pressing the middle mouse button and dragging the
vertex is repositioned. Note that if a non-zero rotation is chosen the image
is updated in a following shift of the vertex. Even more importantly
the user should be aware of the order of rotation performed. In general,
two permutations (distinct orders) of a set of three single rotations
with the same angular amount in each rotation gives very different results. Thus
the order of rotations in MPR is allways defined as
a rotation around the inferior-posterior axis, then rotation around the
right-left axis and finally rotation around the anterior-superior axis . Or
equivalently first the rotation defined in the axial projection panel
followed by the one in the sagittal panel and finally the one in the coronal
panel. Scale
Enable
scale in MPR:
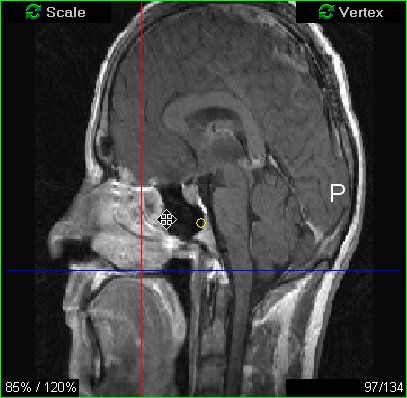
Scaling
is implemented to update the pixel dimension in directions along the axes of
each projection panel. Pressing the left mouse button and dragging in any of
the projection panels scales the pixel dimension along the axes of the panel.
Pressing the middle mouse button and dragging the small sphere describing the
vertex is repositioned. The projection image is updated when the vertex is
moved if a non-unit scaling has been applied prior to updating the vertex
position. The
label in the lower left corner of each projection panel displays the current
amount of scaling along the plane's axes. The amount of scaling is displayed
in percentage, i.e. the original pixel dimension
relative to the new pixel dimension. Files
It is possible to
save the transformed volume to file. The saved image volume is created from
the pixel data of the original image volume and transformed according to the
user's rotations and/or translations. Save
transformed image volume:
The transformations
themselves may be exported to and imported from files. Export
of transformations in MPR:
By exporting the
current transformation it is written to an
ASCII text file. nordicICE by default allocates file extension
.trf for transformation files. Import
of transformations in MPR:
Tips:
|
|