Batch
Module - Getting Started
To
do batch analysis, follow these steps:
1.
Organize
input data to be analyzed in a base directory and give the subdirectories
containing the series to be analyzed a given name.
2.
Select
the settings for image loading in Pre-process.
3.
Define
all settings for the analysis you would like to do.
4.
Set
base directory, and do Search
for files.
5.
Run
the analysis.
See
additional details below:
Introduction
The
batch module can analyze data in DICOM or nifti formats. Some functionality
is only available for nifti data. However, image conversion from DICOM to nifti
can always be performed first.
It
is important that all data to be analyzed in the same batch is of equivalent
type, so that they can be analyzed in the same manner.
The
different types of analysis (Perfusion, ROI analysis, DCE analysis etc.) are
selected in the tabs in the lower row. In the example above, the perfusion
analysis tab has been selected. For some analysis, such as for perfusion,
there are several tabs to define analysis settings. These are seen in the
middle of the image above (Main, AIF, Advanced AIF...).
After
defining settings, the analysis is done by pressing Process. This is true for
all analysis tabs except for Pre-process.
This tab is used as input for the other types of analysis.
Batch
analysis can be done for one or several series. Results will be saved in
specified output subdirectories, or copied to clipboard, depending on type of
analysis.
Before you start
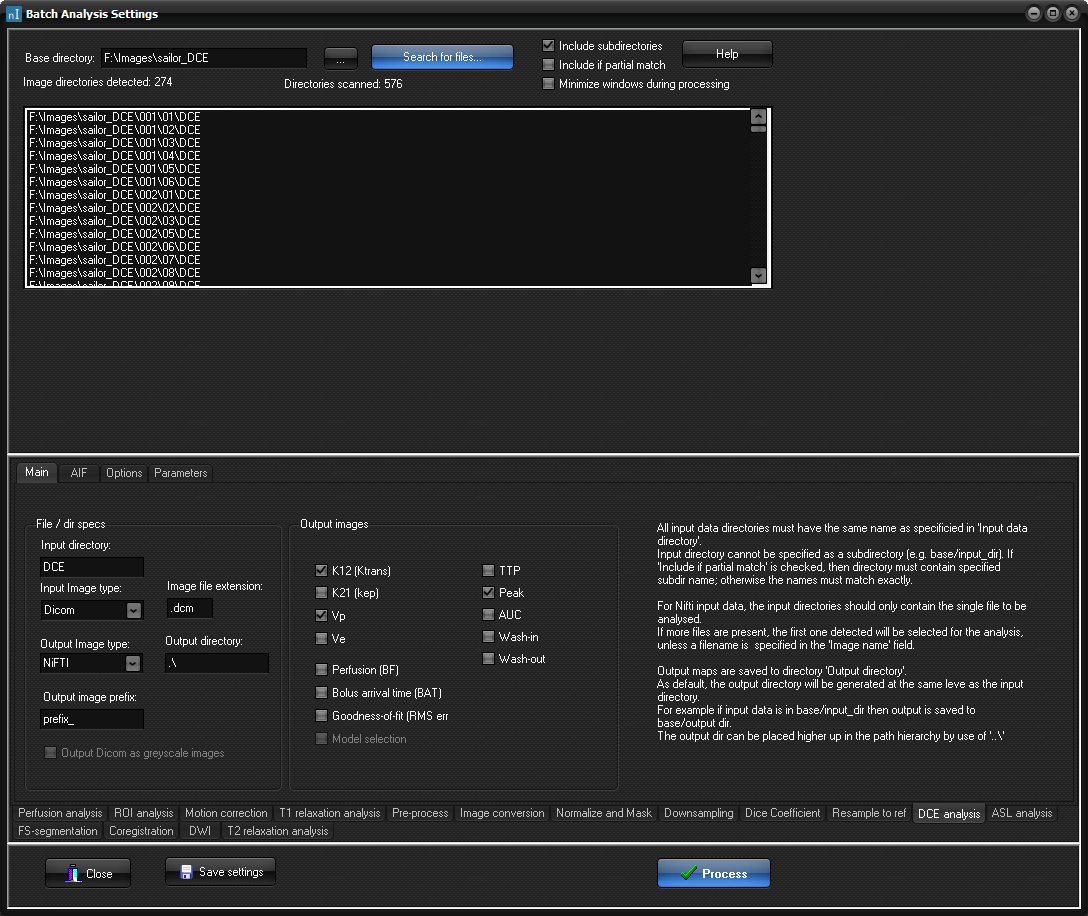
- search for files
When
processing data in the batch module, the application will analyze all data of
a specific type (for example perfusion data) in a selected base directory. For
the application to find the specific perfusion data, one needs to specify the
name of the folder. This means that all subdirectories containing data to be analysed
in the same batch must have the same name. In the example above, the
perfusion subdirectory is named 'Perf', and we see that the application found
six subdirectories with this name, meaning that each of the six studies in
this example all had one perfusion series. If any of the perfusion series were
in subdirectory with a different name,
it would not have been included in the analysis.
Search
for files can be refined based on:
- Include subdirectories: if not checked, only
subdirectories one level down from base directory will be included.
- Include if partial match: if checked, analysis will
include subdirectories even if name specified only partially matches the
subdirectory name, as shown in image below.
Loading of images
An
important first step in a batch analysis is to ensure that images are loaded
in the correct order. This is defined in the Pre-process tab.
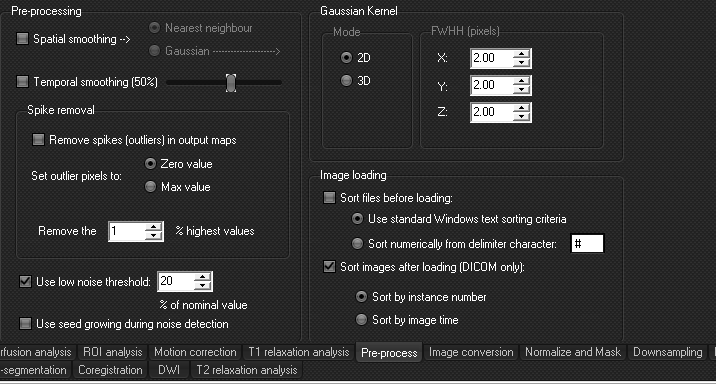
For
DICOM data, Sort using
instance number seems to work best for most data, but this will
always depend on the input data. If image time is used, the specific tag to
be used can be defined in General Options (Select Options in the main GUI
frame).
Performing
analysis
After
image loading has been set correctly, analysis can start. Any preprocessing
to be done can be defined in the same tab.
To
start the analysis, one first need to specify all settings. For Perfusion,
DCE and T1 mapping analysis, remember to specify settings in all tabs.
It
is smart to run the analysis with a minimum number of cases first, to make
sure that analysis runs as expected, and to familiarize yourself with the
analysis, before starting a large batch.
Tips
- Motion correction can be done as part of the analysis
for perfusion and DCE, but it is recommended to do this as a separate
step before you run the dedicated analysis, using the Motion correction
tab. This will save you time in case you would want to repeat the batch
analysis, but do not want to repeat the motion correction.

|